Tonight we had an excellent dinner with our friends and Uncle. Although steak was the main item on the menu, I was also asked to grill some chicken breasts. I fear chicken breasts: the line between raw, perfect, and burned mess is rather fine. In medicine we call this the "therapeutic index. Chicken breasts have a very narrow therapeutic index indeed. One thing that I have found is that a good marinade will help control cooking, allowing you to make sure that the chicken is cooked through while avoiding dried out food. Tonight I made a remarkably simple marinade, marinated the chicken only briefly, and was shocked at how good the results tasted. To be honest with you, so were most of the people at the table. I share it with you now. I don't have a photo, but the final product looks liked grilled chicken breasts (duh).
INGREDIENTS
Chicken breasts, pounded down with a tenderizer or your hand so that they are even, but not "thin"
3/4 cup olive oil
1/4 cup white vinegar +
half of a squeezed lime
one tablespoon salt +
dash of Tabasco sauce
EQUIPMENT YOU WILL NEED
Good hot grill with cover
INSTRUCTIONS
combine all the ingredients in a bowl. Place the breasts in the mix and leave for about 15 minutes or so. Heat the grill.
Shake off any excess marinade from the chicken prior to placing on the grill. Oil will flame, and the less you have the better. Place the breasts on the grill, make sure there isn't too much fire, and cover, which will further limit flaming. If you want perfect grill marks, turn the chicken breast 60 degrees or so after cooking a few minutes. Flip them when they are white up to the top. Again, watch out for flame out and be prepared to cover the grill. After a few minutes, you can do another 60 degree turn for perfect griddle marks on both sides. The breasts are ready when just firm to the touch.
Showing posts with label chicken. Show all posts
Showing posts with label chicken. Show all posts
Sunday, August 12, 2007


Thursday, May 10, 2007
Fast Roast Chicken

I have to admit not being a huge fan of roast chicken, but the lovely wife is and the boys will eat it. So, when I make it I do two things. The first is I stuff it, so that I have something to eat. The second is I try to cook it as quickly as possible. I have found that I can cook a typical "fryer" chicken (3 1/2 pounds or so) in about an hour and can cook a "roaster" in a little over an hour and a half. There are two tricks.
The first one is that the stuffing helps the white meat cook a little slower, so that it doesn't turn into dried soylent green while the dark meat cooks. The second is not to truss the chicken too much (or at all). This exposes more of the dark meat, which again, leads to quicker cooking.
Although I have upgraded the recipe and will post this soon, I still like my original sausage stuffing recipe and fully recommend it. Having said that, any bread or corn based stuffing will work fine. If you don't like stuffing, just use old bread soaked in stock.
INGREDIENTS
Whole raw chicken, preferably 5 pounds or more
Kosher Salt
Stuffing
Pepper
Oil (to grease pan)
EQUIPMENT YOU WILL NEED
Cooking thermometer, preferably a digital one (they are faster and more accurate)
Roasting Pan
Spatula
Decent ventilation (this chicken recipe SMOKES A LOT)
Scissors
INSTRUCTIONS
Preheat the oven to 500 degrees. Cut off the tips of the chicken wings, and stuff the chicken. Salt extremely liberally and pepper to taste. Place on greased roasting pan. Place in oven towards the back of the oven, feet first. After about 10 minutes open the oven and loosen the chicken off the bottom of the roasting pan so it doesn't stick. Put it back.
The real question with whole chicken is how long to cook it. I find that the stuffing gives you a little more time between "raw" and "cardboard," buts its always an issue. In general I let the 4 pound chicken cook at least an hour before sticking a thermometer in, the 5 pound plus ones an hour and twenty minutes or more (figure 20 minutes a pound minus 10 minutes). The more you open it the longer it takes. The most important thing is the thermometer. Stick in in the fleshy part of the thigh, away from a bone. Also stick in the fat part of the breast. If everything is over 160, you are done.
After removing the chicken, pull the stuffing out immediately. Let the chicken sit at least 10 minutes before carving. Serve with style.
You can also make gravy from the drippings, etc. More on this later.
Saturday, January 20, 2007
Paella, the Male Martha Way

I have to admit, my decision to try to make paella was spontaneous, and I really didn't have a recipe as a guide. I went to Wikipedia, which gave me a very Valencian view of the whole subject. I also Googled the words Paella Recipe and looked at some of them, although I focused mostly on this one. I then decided to do my own thing, using all of this as a guide. This seems to be the general sense of paella anyway: a mix of rice and stuff that would taste good in rice. Oh yeah, and saffron, which really does help. I admit there seem to be a zillion ingredients, but its actually not that bad.
I bought my seafood from Citarella. Although there may be other places to get it, and I'm sure its cheaper at those places (oh, how I am sure of this), their seafood is well cleaned which cuts out a lot of the work you need to do, particularly with squid and muscles. The other thing about seafood is when to put each part into the paella. Although I expand on this more in the recipe, clams and similar thick shell bivalves should be put in pretty early, muscles next, squid after that, then shrimp, and scallops right before serving.
INGREDIENTS
2 1/2 cups Basmati Rice (either clean and dry or soaked)
3-4 Chicken thighs, cut into pieces and skinless
4 ounces of chorizo (I used dry, but fresh may taste better if you can get it)
Chicken stock, 2 to 4 cups
White wine 1 cup (you can substitute 1/2 cup of vermouth)
Water (have at least 2 to 4 cups ready)
Olive Oil to saute'
One onion, thinly sliced
One red pepper, ringed and quartered
Two medium tomatoes
1/2 cup of frozen peas
four cloves garlic, sliced
salt
1/2 teaspoon white pepper
10 saffron threads
5 ounces cleaned squid, ringed
1 1/2 pounds cleaned muscles
6 clams
4 ounces scallops
3/4 pound large shrimp, deveined and shelled
EQUIPMENT YOU WILL NEED
Large, deep pan with cover for paella (you can buy an actual paella pan, but you better a) have a lot of space and b) really like to make paella.
INSTRUCTIONS
Add crushed saffron and white pepper to one cup of stock and set aside. Liberally add olive oil to pan and saute the onions in the pan until golden brown and then remove. Add chicken and chorizo and saute as well. Add back onions and add rice. Toast rice but don't burn. Add the stock with spices and stir. Add the wine. Add two other cups of either stock or a mix of stock and water. You will likely have to add some salt at this time as well (1 teaspoon if minimal stock, 1/2 teaspoon if lots of stock). Add the peppers. Stir, make sure heat is low, and cover for 5 to 10 minutes. Its OK to peek and make sure that the rice is not sticking to itself.
Adding the seafood is a bit of an art. Add the clams first, and cover the mixture. Add the muscles several minutes later. Stir, and cover the mixture. Add the squid several minutes after this and, again, stir and cover. You may as well add the peas at this time, too. You can add a bit of water or stock if things look like they are drying out. If the rice almost tastes ready, add the shrimp, which takes 4 minutes to cook. Scallops should be added right before you turn off the heat (two or three minutes for smaller scallops). Its done when the rice is done, the seafood looks cooked and your hungry and tired from all this work. The shells should have opened on the bivalves. The total cooking time from when you add the stock is a bit more than twenty minutes. Check taste and add salt if needed before serving.
Tuesday, January 16, 2007
Arroz Con Pollo

On Saturday we had friends over, and I decided to make Paella. This worked out quite well, and I will write about it over the next few days. Given the number of kids that were going to be at dinner, I also decided to make arroz con pollo. Several things differentiate my arroz con pollo from the garden variety you get at the Spanish or South American Restaurant. First of all, I use a lot of dark meat chicken (and I cook the bones in too, although I remove them later). This adds flavor and dark meat tastes better cooked than the white stuff. I do use that as well, mostly to fool the kids. Although you can use saffron, and I do for paella, I think that turmeric imparts a nice color and actually does have its own, subtle flavor. I use basmati rice, which gives a firm long grain taste, and I do not soak it beforehand. Finally, I really sauté the heck out of the onions. This helps greatly with the flavor.
INGREDIENTS
Chicken Breasts, 2, cur into small pieces
4 chicken thighs, skin off, cut into pieces but retain bones and whatever meat is left on them
2 cups chicken stock
2 ½ cups water
salt
pepper
frozen peas, about ½ cup
2 cups basmati rice (use a brand that does not desperately need to be washed)
large whole onion, sliced and quartered
3 sliced garlic cloves
½ tablespoon turmeric
Olive oil
One tomato, cut up
EQUIPMENT YOU WILL NEED
Deep large pan with cover for cooking
INSTRUCTIONS
Sautee onions in olive oil until they are soft and starting to turn brown. Set aside. Sautee dark meat chicken (including bone pieces) for several minutes, and then add white meat chicken. When cooked on the outside, add rice and garlic and stir around, without burning rice. Add one cup of stock, and stir. Add the turmeric, ½ teaspoon pepper, and salt to taste to other cup of stock and add that. Add 2 cups water, leaving the rest in reserve. Lower the heat on the stove to low, and cover. After about 10 minutes, open, and stir rice, making sure to get any rice that is stuck on the bottom. Cover again. Keep checking every few minutes and stir. Add peas and tomato pieces. If the mixture looks like its drying out before the rice is fully cooked, add a bit of water (1/4 cup or so) and stir like crazy. Its ready when rice is cooked and still moist. Remove bones prior to serving
Saturday, January 13, 2007
Chicken Fingers Redux - Double Dip

Yes, I understand I am obsessed with fried digits. But chicken fingers are a family favorite, and I am always excited when a new way to make them works out.
I have always thought that, despite the oil and crumbs, that there was a bit to much health in my fingers. In fact, I have always wanted them to look and taste like "real" fried chicken: moist on the inside with a real crust. If you are willing to soak the fingers for a bit before sauteing in the pan, willing to put a bit more oil in the pan, and, most importantly, double dip, then you can feel like your kitchen fingers came straight out of the South.
INGREDIENTS
Chicken fingers, cut into strips (2 packages, about 24 ounces)
1 1/2 cups milk
1 egg, beaten
All purpose flour, for dredging (about a cup)
Panko Japanese bread crumbs
Salt
Canola Oil
Olive Oil (optional but good)
EQUIPMENT YOU WILL NEED
Heavy skillet for sauteing
Two shallow bowls for dredging chicken
Tongs for manipulating chicken
Larger bowl for soaking chicken
Plate with paper towels to put chicken on
Plate to hold chicken between dippings
INSTRUCTIONS
Cut chicken into stips. I actually bought pre-cut "tenders." Beat egg and milk, and add about 1/2 teaspoon of salt to this mixture. Soak the chicken in this mixture for about a half hour. During this time prepare two bowls: one with all purpose flour and one with Panko, mixed with about 3/4 teaspoon salt. Also, place about 1/3 " oil at the bottom of the skillet.
Shake off excess moisture and dredge chicken pieces evenly in flour. Place on dry plate. Start heating oil (I use mostly canola with a bit of olive oil for flavor). When the oil is ready, dip the floured chicken strip back in the egg/milk mixture to moisten and then in the panko. Place in skillet. Continue to do this in batches, leaving enough room. When the edges of the chicken are golden brown, flip with tongs. Remove and place on paper towels. Serve with appropriate condiments.
Wednesday, November 22, 2006
Happy Thankgiving and Lime Chicken

Happy Thanksgiving to everyone. As I am usually on call for this holiday, the only thing I cook on Thanksgiving is gravy. And that recipe is a secret, mostly because I make it up every year as I go along. In honor of this, I have decided to share with you a recipe that tastes absolutely nothing like any of the stuff you usually eat on Thanksgiving: chicken thighs in a lime flavored broth. This Mexican style dish merges the joys of "fall off the bone" chicken with the light flavor of a lime and cilantro based chicken stock. If you do it right does not put the G in gadempt (My apologies to non-yiddish speakers). The trick in this recipe is to use chicken thighs, which survive the braising and simmering process much better than breasts, which have a narrow window of cooking time between excellent and rubber. If you insist of adding breasts to this meal (it will not work with breasts alone, as they are devoid of fat), add them to the broth 30 minutes after you add everything else.
INGREDIENTS
12 chicken thighs, skinless but with bone
2 3” onions
4 sliced garlic cloves
2 splashes of tequila
2 chipolata peppers from can (I bought these at grocery on 85th and Broadway)
3 limes, juiced (have another ready for taste)
pepper and salt
2 teaspoons dry coriander
fresh coriander
chicken stock (about one quart)
SUPPLIES YOU WILL NEED
Large pot to cook chicken/stock (dutch oven or other large covered pan would be great)
Skillet to brown thighs if you do not have a dutch oven or other large covered pan
Good knife
cutting boards
Stirring implements
Tongs help a lot
Chop onions and garlic and brown in pan. Remove and set aside. Brown chicken thighs (do it in batches if pan is not large) and set aside. Add onions, garlic and chicken to large pot. After removing grease from pan add a little stock to the pan if it is not burned and scrape off any drippings. Add this to pan.
Place pot on medium flame. Add dry coriander Add enough stock to cover chicken. Add lime juice. Add two peppers from the can (you can add three if you like a lot of heat). Add at least 1/4 teaspoon pepper and not more than 1/2 teaspoon (you can always add more at the end). When the mixture starts to boil, turn down to low and simmer uncovered. Let cook about 1 hour or so. Chicken should be soft and almost fall off the bone. Be sure to skim off the grease!! Re-salt and pepper liquid to taste and add fresh coriander few minutes before turning off flame. Tastes great with rice and tortillas!
Saturday, November 18, 2006
Fried Chicken at Spoonbread Makes Everything Better
 Unfortunately, the Hockey Hawks of Central Park were narrowly beaten by the Staten Island Rangers. Fortunately, Lasker rink is right next to Miss Mamie's Spoonbread Too (on 110th Street off Columbus), one of the better places in New York City to get fried chicken. Spoonbread chicken has a moist inside and a well spiced crust. It is not overly crunchy. I like their shortribs as well, but would avoid the pork ribs as they are to sweet. The collards are excellent, clearly cooked with smoked turkey and full of flavor. Boy 1 and Boy 2 both love the mac and cheese, and I must admit, so do I. The fries you see are for the under 15 set. Prices are reasonable, and its easy to get to on the c train or 1 train to 110th Street (you can walk the two blocks to Columbus!)
In addition to their two restaraunts Spoonbread also has an excellent catering department. The lovely wife and I used them last year for our Superbowl Party, and the food was delicious and the servers they supplied excellent.
Thursday, November 16, 2006
New Rice Maker Arroz Con Pollo Recipe
I'm improving. Instead of just eating cheese and rice maker rice, I actually made a rice maker dish tonight. It mostly worked, and for that reason I'm going to post it. Several weeks ago I had tried to make arroz con pollo in the rice maker, and ended up with dessicated evil. Tonight, I added a pan to the mix. By sauteing the onions prior to putting them in the rice maker, I was able to improve the taste of the rice considerably. Rather than add chicken in during cooking, I sauteed the chicken at the last minute and mixed it in the rice right before serving. Although it took a few extra minutes to do these steps, it was worth it at the end.
INGREDIENTS
2 cups rice for rice maker (long grain rice)
Chicken Broth as required to fill to the 2 cup line on the rice maker
One onion, chopped
1/2 teaspoon turmeric
1 tablespoon butter
olive oil for sauteing
12 ounces chicken breasts cut into 1" pieces
garlic powder
Tomatillo Salsa (I like Frontera brand)
EQUIPMENT YOU WILL NEED
rice maker (it helps to have a "mixed rice" cooking control)
Saute pan
wooden spoons
INSTRUCTIONS
Wash the rice as per the rice makers instructions and add the right amount of broth. You can add a bit of salt if it is "low salt" broth. Saute the onions in olive oil until they start to brown. Add to rice maker. Add butter to rice maker. Mix around, cover and turn on "mixed rice" setting. It is important to stir the rice when it is ready as the sugar in the onion can burn. Right before you are ready add some oil to the saute pan and heat up. Liberally apply salt and garlic powder and place in hot pan. Turn frequently. The trick with breasts is to remove them before they are hard. You can cut into one. If it is white, they're ready. Add the Breasts to the rice and stir. Serve immediately. Liberally use tomatillo salsa.
Saturday, October 28, 2006
Sausage Stuffing: Making Chicken Edible
I am not a fan of Roast Chicken. Its chicken and, even if cooked perfectly, tastes like chicken. I may as well have alligator, ostrich, or something more exotic that also tastes like chicken. But, chicken is easier to get, and its hard to keep the ostrich in the refrigirator. Good stuffing saves chicken. Its tasty, acts as a side dish, and, if you don't love chicken, you can make a lot and eat the stuffing as the main dish and the chicken as the side.

The easiest stuffing to make is sausage based. A decent sausage has most of the spices you need, a certain amount of oil, and of course, sausage, which is good, if not good for you. This recipe has few ingredients, few requirements, and is almost impossible to screw up. Its also easy to expand exponentially, in case you want to stuff a turkey. Or even an ostrich.
INGREDIENTS
6 hot sausages (you can use sweet, or a mix or the two, but most Italian hot sausage is just not that hot)
One medium onion, diced
one to two cups of chicken stock
teaspoon of either thyme or rosemary
day old bread (or fresh if you can't) that is "country style." I use Eli's Country Round, about one pound, but have even used challah in a pinch. Its all good.
Olive oil
EQUIPMENT YOU WILL NEED
Large skillet or braiser with deep sides to hold onions, sausage, and bread
Loaf pan or small roasting pan to cook stuffing that wasn't stuffed.
Good Knife
Spatula
Bowl to hold sausage after cooking and before adding back to recipe
INSTRUCTIONS
Chop the onion. Cut each sausage casing lengthwise and squeeze out meat. Remove the crust from the bread and chop bread into cubes about 1/2" in length. Don't worry if you are off a little. Heck, don't worry if you are off a lot...its all good. Heat the skillet and put in a little olive oil to avoid sticking. Add the sausage meat and brown, chopping it with the spatula (it tends to clump) as you do. After it is done remove to bowl and scrape off any stuff thats stuck (add this to bowl if not burned). Add some more oil and then the onions. Cook till soft or lightly brown and then add the sausage back. Add the bread and mix all around. The bread should get lightly cooked and covered in sausage grease and olive oil as you do this. Add about 1/2 cup of chicken stock and rosemary or theyme and mix and scrape the bottom of the pan to get all the drippings. The stuffing is now ready to stuff or cook.
TO STUFF CHICKEN: Using a spoon, place stuffing in cavity. I usually fill as tight as possible.
TO COOK REST: Transfer rest of stuffing to loaf pan or small roasting pan (if you have one a loaf pan is better) Add about 1/2" of chicken stock. Cover in aluminum foil. Cook with chicken and it will be ready when chicken is ready.
Thanks to our friend who has moved to Westport for the phrase "its all good."

The easiest stuffing to make is sausage based. A decent sausage has most of the spices you need, a certain amount of oil, and of course, sausage, which is good, if not good for you. This recipe has few ingredients, few requirements, and is almost impossible to screw up. Its also easy to expand exponentially, in case you want to stuff a turkey. Or even an ostrich.
INGREDIENTS
6 hot sausages (you can use sweet, or a mix or the two, but most Italian hot sausage is just not that hot)
One medium onion, diced
one to two cups of chicken stock
teaspoon of either thyme or rosemary
day old bread (or fresh if you can't) that is "country style." I use Eli's Country Round, about one pound, but have even used challah in a pinch. Its all good.
Olive oil
EQUIPMENT YOU WILL NEED
Large skillet or braiser
with deep sides to hold onions, sausage, and breadLoaf pan or small roasting pan to cook stuffing that wasn't stuffed.
Good Knife
Spatula
Bowl to hold sausage after cooking and before adding back to recipe
INSTRUCTIONS
Chop the onion. Cut each sausage casing lengthwise and squeeze out meat. Remove the crust from the bread and chop bread into cubes about 1/2" in length. Don't worry if you are off a little. Heck, don't worry if you are off a lot...its all good. Heat the skillet and put in a little olive oil to avoid sticking. Add the sausage meat and brown, chopping it with the spatula (it tends to clump) as you do. After it is done remove to bowl and scrape off any stuff thats stuck (add this to bowl if not burned). Add some more oil and then the onions. Cook till soft or lightly brown and then add the sausage back. Add the bread and mix all around. The bread should get lightly cooked and covered in sausage grease and olive oil as you do this. Add about 1/2 cup of chicken stock and rosemary or theyme and mix and scrape the bottom of the pan to get all the drippings. The stuffing is now ready to stuff or cook.
TO STUFF CHICKEN: Using a spoon, place stuffing in cavity. I usually fill as tight as possible.
TO COOK REST: Transfer rest of stuffing to loaf pan or small roasting pan (if you have one a loaf pan is better) Add about 1/2" of chicken stock. Cover in aluminum foil. Cook with chicken and it will be ready when chicken is ready.
Thanks to our friend who has moved to Westport for the phrase "its all good."
Wednesday, October 25, 2006
Chicken Fingers Plus, AKA the Cutlet

Chicken Fingers only go so far in life. They are easy to make, but if you remember the eighties (or, gulp, even the nineties) you probably feel a little silly eating them for dinner. This is where the cutlet comes in. Same stuff, different appearance. And you get to bang the heck out of them with a hammer! Once you have made the cutlet, it can be used a variety of ways. Today I will describe the basic chicken cutlet recipe. I will also reveal the secret of Male Martha's "instant parm" recipe, which only adds two more ingredients and one more pot. If you time it well, you can make the whole recipe, including the parm, in about one hour, which includes 1/2 hour of actual work. The only ingredient thats not normally sitting around the house is Panko, which is available many places (see below).
INGREDIENTS
Chicken breasts, skinless, boneless and whole (one to two packages; 6-8 breasts)
Milk (enough to have the chicken sit in)
1 egg, beaten
Kosher salt
Pepper (optional)
Panko (Japanese bread crumbs: available throughout NYC and likely everywhere else, too)
Parmesan cheese
Corn meal (white or yellow)
Canola oil
Olive oil
Ball of mozzarella cheese
Pasta to serve with meal (thinner pasta cooks faster, so linguine is always good)
32 ounces of simple tomato sauce (I like Jerry's if I have no homemade available)
KITCHEN EQUIPMENT YOU WILL NEED
Large skillet for frying
Plate covered in paper towels
2 bowls: one for holding chicken, milk, egg and salt mixture and the other for breading
Tongs (not necessary but they really help)
Metal Spatula
Large pot for boiling pasta
Good Knife
Roasting or baking pan to hold chicken for baking.
INSTRUCTIONS
Fill the large pot halfway up with water and set on the back burner to boil. Add one teaspoon of salt or so for each quart of water. Add a few tablespoons of olive oil to keep pasta from sticking. If it starts to boil before you are ready change heat to low and cover. Preheat the oven to 450 degrees.
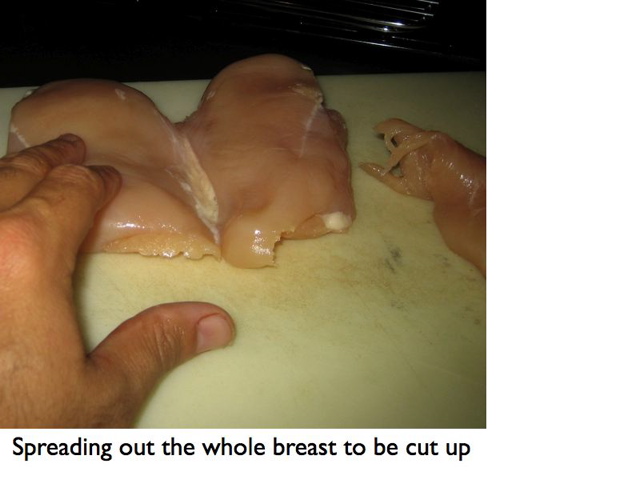
Chicken breasts should be whole. Flip them over and you will see a small membrane. Cut the membrane (not the meat) and separate. It almost looks like a mitt. Then flip the breast back so that the shiny end (skin side) is on top. Take the meat tenderizer, and pound the meat with the flat side until it is all about 1/3" thick. The evenness is important. Don't be shy.
Mix egg in bowl. Add milk and mix together. Add about 1 teaspoon of salt and pepper to taste (I would not add more than 1/4 teaspoon). Add pounded chicken breasts to cover (add more milk as necessary) and set aside in refrigerator.
Mix together approximately equal parts of panko and cornmeal. If you want "Parm" add 1/2 of a part of grated parmesan cheese (it helps to use the good stuff and not Kraft). Add enough salt that you can taste it a bit. Add a drop of pepper. Add about 1/4" of oil (half olive and half canola) to the skillet and heat on high. When its hot, you're ready to go.
Dredge breasts in bread crumb mix and coat well. Place in oil and leave room. If you don't, you'll get greasy chicken. Let fry till cooked on the sides (see photo) and then flip using tongs. Cook on other side till brown (you can pick up corner with the tongs to see how its doing). Place on paper towels. The cutlets are now done.
To make easy parm, place the cutlets in the baking pan. Cover the cutlets completely with sauce. Add mozzarella slices to the top and place, uncovered in oven. Add the pasta to the boiling water and cook. It usually takes 15 to 20 minutes to heat up the sauce and dry it out a little and melt the cheese. To be extra fancy, you can broil the cheese and brown it. Serve with the pasta.

Saturday, October 14, 2006


Wednesday, October 11, 2006
Chicken Fingers of the Gods

I don't love chicken fingers. Not that I hate them, but I don't think of them as the type of food that I would choose to eat, cause, say, it was my birthday. But I'm not 10 years old today, and my son is, so chicken fingers it is. Having said that, frozen chicken fingers are as close to Frankenfood as anything I have ever seen. Don't get me wrong, I floss with trans-fat and believe in the healing powers of sausage. But those bread product filled frozen chicken product fingers are just disgusting.
One thing I have discovered about pan fried fingers is that it is less about the actual coating and more about the prep of the chicken fingers beforehand and more about soaking them first. I have used Japanese bread crumbs, Parmesan cheese, cornmeal, breadcrumbs and flour, all with a decent result. What's best? If your eating chicken fingers, the answer is whatever you happen to have in your kitchen.
INGREDIENTS TO BUY
Package Chicken Breasts, boneless and skinless (some people like Kosher because
it fries easier and you don't have to add any salt to anything
Whole Milk enough to fill a bowl to soak chicken
Kosher Salt
Pepper to taste
Corn Meal(white or yellow)
One egg, beaten
White flour, bread crumbs, Japanese Bread crumbs
or some other such crumb like thing.
Oil for pan frying. I like 1/2 olive oil and
1/2 canola (which cuts down on the smoke)
KITCHEN EQUIPMENT YOU WILL NEED
Good knife to cut chicken
Heavy bottom frying pan (large is better, cause you can cook more at once). I like cast iron because it is cheap, cooks evenly, and I have no problem with its weight.
Several bowls to hold milk, breadcrumbs
Spatula (metal so it doesn't melt)
Measuring spoons
A paper towel covered plate to put cooked chicken on
INSTRUCTIONS
Take Chicken and cut into even sized "fingers." I find that you can get 3 or 4 per breast. Try to keep them a somewhat similar size so they all take about the same amount of time to cook. There is often some membrane or gristle on the breast. Its worth it to cut it off. Drop the pieces in milk and the beaten egg(add 1 teaspoon of salt for each cup of milk that you use) and put the whole thing in the fridge (cause Salmonella sucks) Leave it at least 20 minutes and for up to an hour or more.
While this is happening mix together about one cup of cornmeal, one cup of the other crumb or flour product you are using and two teaspoons of salt. Fill the pan with oil to about 1/4 inch or so.
When you are ready to cook, remove the chicken from the fridge. Heat the oil in the pan to a little less than smoking (in all honesty, just put it on high and if you don't see smoke its cool). Take the chicken pieces, remove them from the egg/milk mix, shake them, and dredge them in the crumbs. Place in the pan. There should be a little room in between pieces.
In the best of all situations, you would know exactly when to turn the chicken so its entirely brown on one side and ready. Its better to have light tan chicken fingers than black ones. Turning a lot is fine. They are done when they feel firm to hard to the touch. Feel free to cut into one if you are not sure. It usually takes 8 minutes to cook. Tastes like chicken. Is good with ketchup or mustard.
Subscribe to:
Posts (Atom)