Showing posts with label cookware. Show all posts

Saturday, December 08, 2007

Alessi Egg Cups: Make Soft Boiled So Cool!


The lovely wife loves her soft boiled eggs. And who can blame her? They are like a poached egg in a shell. For Chanukah, I bought her (with a little prompting, I must admit), the incredibly cool "Cico" egg cups made by Alessi. Getting them is harder than I thought: although available online, the only place I found them in NY was at Pinkberry, where I must give props to the manager at the 110th Street and Broadway store for being so helpful to me. Compared to the garden variety egg holder, the "Cico" is cool looking and also comes with its own built in salt shaker.

Cico is part of Alessi's "A di Alessi" line of affordable, cool looking products: I highly recommend a look through their site.

As for me, I like my eggs fried, but thats probably not a surprise to anyone.

Monday, May 07, 2007

Grilling Season Begins!


Ah, grilled corn. One of my favorites. This corn was grilled and then I added a salt, a little mayo and a little queso blanco (actually available at Zabar's!), and served it up for dinner. The only problem is that I live in the middle of Manhattan in an apartment. So how did I get this mildly burned yet excellent tasting corn? Simple: the stove top grill!

Although many people in New York have an actual gas grill as part of their fancy stoves (including me, to be honest), these units often don't get hot enough. There are poor grill marks, long cooking times and a whole lot of complaints. As for vegetables, forget it. Vegetables need higher grilling temperatures than meat.

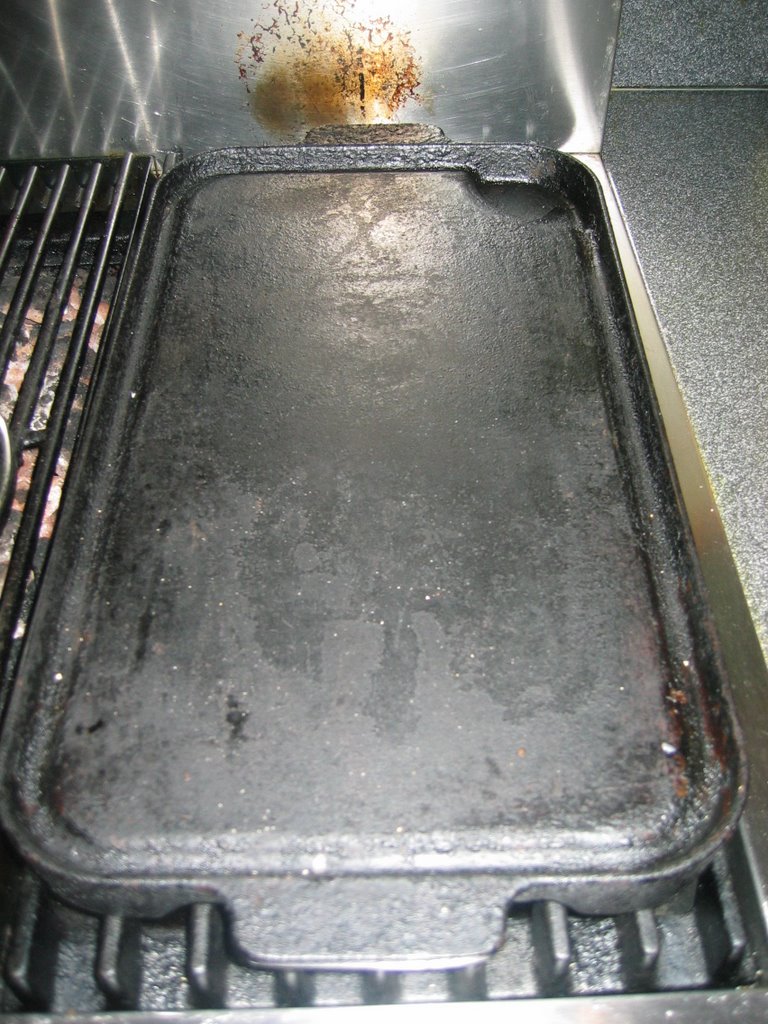
Enter the stove top grill. This device, essentially a griddle with ridges (a corduroy griddle?) has been around for years. You can buy a double wide version from Caphalon or All-Clad for about $100, or you can buy a cast iron one for about $30. I have a cast iron one made by the Typhoon Company, which I got at Zabar's. Because it is cast iron it gets incredibly hot, making it an excellent grilling source. My only problem with it is its low lip. If you try to grill fatty meat, you can have a fire, a mess, or both (tonight with steaks I managed both). But the regular broiler does a good job with those meats anyway, and you can cook the meat there while you prepare your vegetables.

Because of their lower fat content, vegetables produce much less smoke when cooked. This makes them ideal for apartment grilling. The char and flavor produced by a seasoned tabletop grill is similar to gas, but not as good a charcoal. I will go into details at a future date, but the tabletop grill works well for peppers, eggplant, tomatoes, onions and garlic. The model I have works on gas, radiant ring and solid top ranges. Even for vegetables, its a bit smoky, so decent ventilation is a must.

Summer is approaching fast. The beach calls. I'm starting to eat vegetables again. But grilled ones.

Saturday, January 27, 2007

Broiler Pan Warps


I like my broiler. Its almost as hot as a professional "salamander" and makes an extremely tasty steak. It browns meat and almost anything else quickly and easily. My broiler is not unique or new; in fact it is 10 years old. Many people I know have redecorated their kitchens with ovens that are either similar or superior to mine. Which leads me to a question: why can I not find a broiler pan that doesn't warp when placed in my broiler. I just bought a new broiler (a Roshco "Commercial Quality") and made steak last night. On its first use, the thing, warped up at least one inch during cooking. I made another one this afternoon, with a similar result. In fact, I can't remember the last time I broiled a steak in any oven and the broiler pan didn't warp, making even cooking more difficult. I can't figure out why all of the various makers of ridiculously expensive cookware can't make a broiler pan with a heavy drip pan that will withstand warping in the heat. There has got to more of a market for this than for the Paella pan that all of them seem to sell for several hundred dollars!

Just to check, I went to Amazon, Sonoma, All-Clad and Calphalon's web site to make sure I didn't miss anything. No such luck. I do not have any particular advice on how to avoid warpage, so this is more of a rant than anything else. I try to move the meat around the pan as much as possible so it cooks evenly. But the whole thing irritates me. Broiling is common, professional salamanders are still rare, and someone should manufacture a heavy, heat resistant broiler pan.

Friday, November 03, 2006

European Style Rice Maker Rice

I love our new Ricemaker. I have made excellent sticky rice and sushi rice with it. However, I usually cook Western style food and my goddess of proper rice has always been Julia Child. I have always followed her recipe in The Way To Cook, which I feel is the single greatest general cook book ever written. Having said that, if you get distracted for a moment, her rice recipe goes to a sticky, goopy hell.

For my Wester style rice, I wanted to use long grain rice that was not sticky. I also wanted to include three ingredients not used in the preparation of Japanese rice: butter, salt and bay leaf. I had origianlly used Carolina Rice, but found it to be a bit sticky. I then located a brand called "Arroz Rico" at the Grocery Store on 86th Street and Broadway (I'm sure it has a name, but I don't know what it is). Arroz Rico is a Puerto Rican brand, and appears to be mostly sold there and in Florida. It has a very long grain and is not sticky at all when cooked.

The bay leaf presented an interesting issue for rice maker rice. The bay flavor and smell is greatly accentuated in a rice maker, probably because the system is sealed and the rice tends to cook longer than it does in a pot. So I ended up using 1/4 of the amount of bay leaf that I normally would, with a similar taste.

Fortunately, butter is butter, and I was able to use the same amount that I normally would for stove rice.

The recipe is simple. I made two cups which was plenty for two adults and two children as a side dish. You can adjust as needed.

INGREDIENTS


2 Japanese cups rice, washed as per the rice cooker's instructions
1 tablespoon unsalted butter
1/2 teaspoon salt
1/2 dried bay leaf

EQUIPMENT YOU WILL NEED


Rice maker
Rice scraper or spatula (usually supplied with the rice maker)

INSTRUCTIONS

Wash rice and add water to 2 cup level. Add salt and stir a bit in bowl using non-scratch spatula. Cut or mush butter into little pieces and stir in. Make sure no rice is stuck to sides. Add bay leaf. Cover and turn on. After it is done remove bay leaf and fluff rice with rice scraper. Eat.

Thursday, November 02, 2006

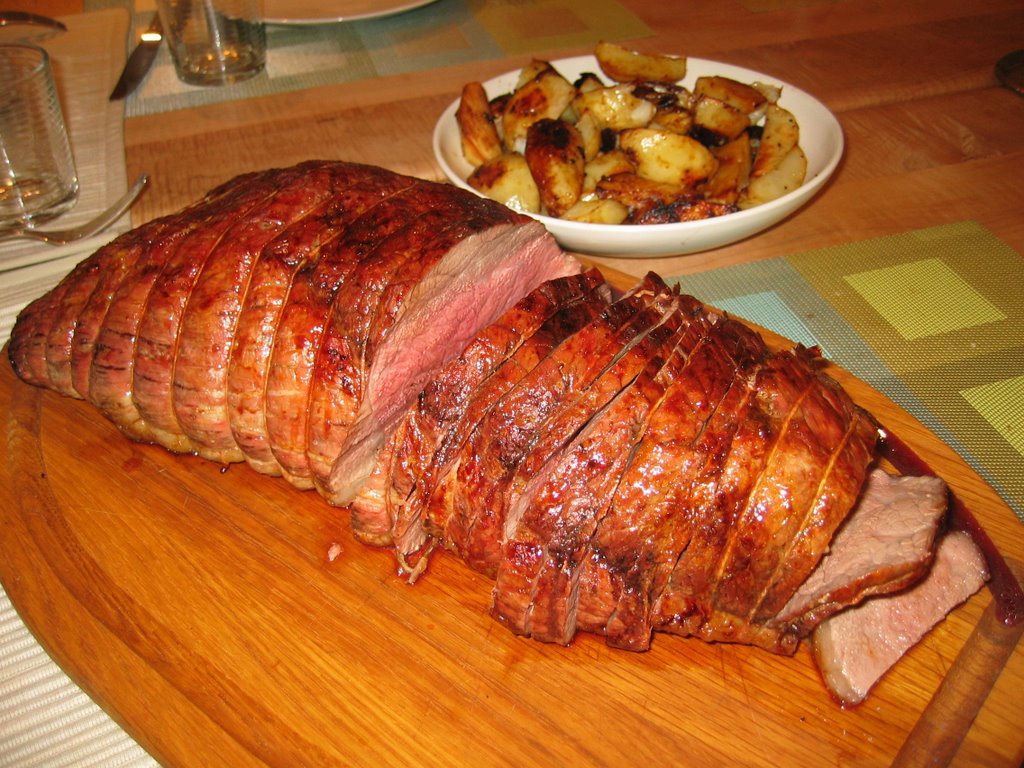
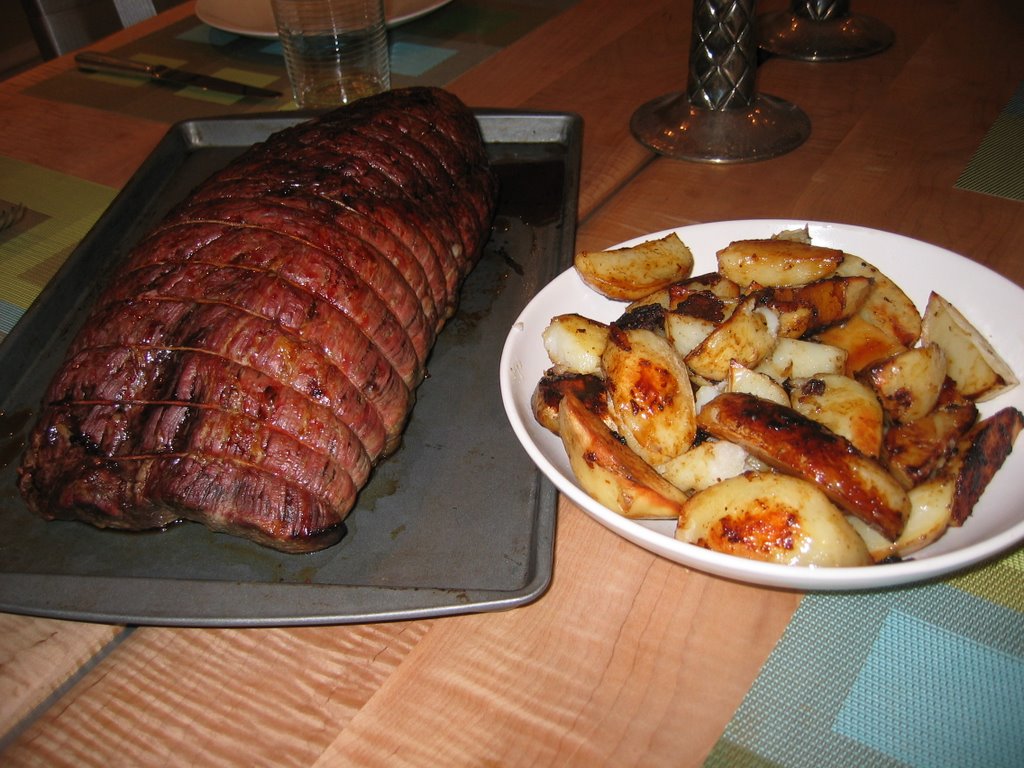
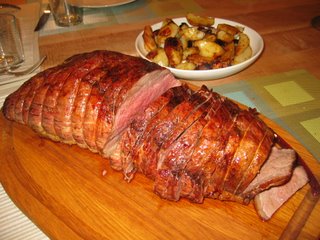
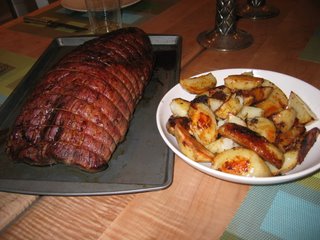
Roast Roast Roast Beef


I like to serve roast beef (whole sirloin) when we have lots of people over to the house. With minimal work, it is possible to serve a roast beef to many people. It does not take a lot of your time either, although it takes a lot of preparation. You have to remember to check the temperature of the roast frequently. All non-vegetarians seem to like it, and sirloin is a relatively inexpensive cut of meat. You can throw it roast potatoes (which you make in the same pan) for a completely tasty carnivorous meal. If you do make the potatoes, there will not be enough grease or drippings to make gravy, but roast beef tastes good with good mustard or even a little bit of salt. For very special occasions you can up the stakes by making a prime rib. I personally do not like to make tenderloin as it tastes like expensive, soft nothing.

The trick is the bying and tying of the beef. I find the best way to do an excellent job of tying is to have someone else do it. Its nothing personal, but a good butcher is a professional who can truss up a roast completely while you are still trying to find the twine and scissors. Our friends at Ottomanelli's on West 79th Street have excellent meat and are the friendliest butchers on the West side (and we all know whose butchers are NOTthe friendliest). They have an excellent roast, and they do a beautiful job of tying it with butcher's twine. You can call ahead and they will have it ready.

How big a roast to buy is a question I have never been able to answer well but I will try. The most important thing to know is that it is better to waste $8.00 and a bit of meat and buy more than you need. A larger roast is easier to cook anyway. I usually use a formula of 8 ounces per man, 6 ounces per woman, and 4 ounces per child. Teenagers and fat guys can easily eat 12 ounces of meat or more so be ready. A 6 1/2 pound roast is a good size for 12 adults and 6 kids. How did I get this number? I made it up.

Potatoes are an excellent side dish with roast beef. Roast potatoes can be made in the same pan as the roast beef. A fattier roast will produce better, browner potatoes. Adding some olive oil to the potatoes will help them brown in this situation.

INGREDIENTS

Roast Beef (usually sirloin): tied up with butcher's twine (at least 5 pounds!)
Yukon Gold or other boiler potato, peeled: 2 small or one large per person
Kosher Salt
Pepper
Thyme (1 to 2 teaspoons)
Olive

EQUIPMENT YOU WILL NEED

Large Roasting Pan
Instant Read Meat Thermometer (the digital one)
Peeler (see my recommendation here)
Spatula
Serving tray that will hold drippings from roast and not cause a mess

INSTRUCTIONS

I like cooking hot. Preheat oven to 500 degrees. Pat meat down with paper towels, salt heavily and pepper lightly. Grease roasting pan with olive oil and put roast in. While oven heats peel potatoes and cut into quarters (cut lengthwise twice to make long fingers of potatoes). Coat in olive oil and add salt and add Thyme. Put aside.

Put pan in oven when heated. After about 10 minutes open the oven and using a spatula, make sure the roast is not stuck to the bottom of the pan. Add the potatoes. They should all be touching the roasting pan and some room around. If you have to many potatoes, I will have another recipe for making them separately soon. Close oven. Turn heat down to 350 after about 15 more minutes (If your oven starts to smoke, turn it down! It will still taste great and fire sucks).

The most important question to answer, and the hardest, is how long to cook the roast for. The answer is "it depends." Fattier cuts of meat take longer, and sirloin is rather lean. Even at 350 degrees, each pound of meat adds 15 to 20 minutes per pound, depending on doneness.

If you make a six pound roast, and let it cook to an internal temperature minimum of 125 degrees, figure it will take 80 minutes to cook the roast, but the times will vary. A lot.

As you can see, the need for extra time in cooking is very important. The other really important thing is a good instant read thermometer. I currently use an inexpensive one that I bought at Target, but have recently received a cool new one from my friend Dan, from Gadgetoff, the greatest event on the planet. I plan to review it soon.

Even when you use a thermometer, how do you know the meat is done. I like taking several measurements. The lowest one, usually in the center of the roast, should be in the rare range, at 120 to 125 degrees. In a large roast, the sides will be warmer, hopefully in the 128 to 135 degree category. You can give those people that eat well done the ends. Thats what they deserve.

As you take the temperature, flip the potatoes around and makde sure they are well coated and browning. They are hard to overcook, but, if you are worried "test one." No one will ever learn.

After you remove the roast, it MUST rest for 20 minutes or so. This will let the juices redistribute. Cooking will continue, so if you really like red and bloody, make sure to take it out when the middle is 120 and the sides not much more. If the roast rests, even if it is quite red to the eye, it will be more cooked than it looks. This makes everyone happy!

Slice as thinly as you can with a good knife. Serve with the potatoes. I will have more on sauces later, but you can make an excellent mustard sauce with a good Dijon Mustard (I like Maile) mixed with a little bit of milk.
Tuesday, October 31, 2006

Everyone Needs a Griddle


I love my griddle. Flat, fun and easy to clean, griddle's make almost all cooking easier. In the past week alone, I have made bacon, pancakes, hamburgers, grilled cheese and fried eggs on the griddle. Grease rolls off, so bacon and other greasy foods cook without flaming up. Pancakes, burgers etc flip quickly and, if you buy the double burner griddle, you can cook a lot of product at one time. An aluminum griddle is also useful to defrost food quickly, as it evenly dissipates heat. So the decision to buy a griddle is easy but the better question is "which one?"

For the past 6 years I have owned the Chef's Design Model 4240. It is an inexpensive aluminum double burner griddle reinforced with stainless steel that includes a decent sized drip pan. It it easy to clean and can even go in the dishwasher occasionally. It does need to be seasoned, but this truly has helped its nonstick properties over the long term. The griddle has survived 6 years of heavy household use. All Clad makes a griddle as well, but its drip pan is small and why would you spend three times as much when you don't have to? It does have nice handles, however. Caphalon and Kitchen-Aide also make double burner griddles, both of which are reasonably priced. However, neither has a decent sized drip pan. Cast iron grills are cool as a concept, but weigh as much as a small car. You'll need to eat your creatine to use them regularly!

Sunday, October 22, 2006

Rice Cooker #1

It uses fuzzy logic! And it makes rice! How could I avoid owning what many others already have... a rice cooker. I have tried many ways to make rice, and until I bought the Zojirushi NS-ZCC18 at Zabar's, I always had rice maker envy. So last week I trudged up to the Mezzanine and looked at the numerous machines that Zabar's has in stock.

Rice cookers come in all shapes, sizes and prices. The simplest machines have little more than an on and off switch. I, of course, wanted something more complicated. More advanced rice makers make many different kinds of rice and are also usable as a rice "crock pot" to make rice based recipes. Zojirushi, the industry leader, has several models with built in microprocessors that use "fuzzy logic" to help them best determine when the rice is ready.

Two Zojirushi 10 cup rice makers were available at Zabar's with "fuzzy logic." The salesman who helped me was very pleasant, but could not explain why one of these models cost $50 more than the other one. Since I had no idea I bought the cheaper one. The more expensive model is the NH-VBC18 model. So I bought mine, the aforementioned NS-ZCC18, for less than it cost on Amazon!

Not spending the money was probably a good idea, too. The higher priced model has two added features. First, it heats the rice using induction heating, which theoretically provides perfectly even heat throughout the cooking bowl. It also makes up for measuring errors. Given that even the simplest cookers do a fine job at making rice, and that measuring rice is not that hard, this seemed like a bit of overkill. The second feature is the ability to make "GABA brown rice." This is not some strange Franken-rice, as I originally thought. In fact, the machine preheats regular brown rice to 104 degrees for two hours prior to cooking. This releases more GABA, a neuropeptide that is also found in brown rice and is supposed to have all kinds of wonderful effects on the kidneys and blood pressure. My professional opinion: BS.

I have made several batches of rice. After a bit of experimentation I can now make perfect white rice. It also keeps for hours. The manufacturer suggests not going past 13 hours, but rice made Friday tasted great for breakfast on Sunday! After this my wife made me throw it out.

Hopefully, I will have more to say about the things you can do with this machine as I use it more.

Saturday, October 21, 2006

Maple Peanut Brittle is Fabulous!


Last night, in addition to having hockey puck Chinese buns from the West Village and an excellent roast (more on this later) I decided to make peanut brittle. There was no real reason, other than it seems easy and I've always liked it. It was a success. And as soon as I post this, I am heading right to the gym to make up for all the brittle I've eaten (or maybe I'll play another round of Lego Star Wars). The key ingredient is salt, which you add. As we all know from snack food commercials, there is a balance between salty and sweet. The peanuts in brittle should not be devoid of salt, this upsets the taste balance. But a standard salted peanut has too much salt, and the taste balance is so bad you will need a drink to wash the stuff down. By controlling the salt, you become the master of the balance, which certainly is better than Frito-Lay doing it for you (although I think they claim to control Salt and Crunch).


INGREDIENTS

5 cups sugar
1/3 cup maple syrup
1/2 cup water
1/4 teaspoon cream of tarter

Eight ounce can unsalted cocktail peanuts (the Planter's Can)
3 tablespoon warm butter (not melted)
Kosher salt (probably about 3/4 teaspoon)

KITCHEN EQUIPMENT YOU WILL NEED

Good 4 or 5 quart pot
wooden spoon, greased with canola oil
candy thermometer
Cookie sheet, greased with canola oil and left in the fridge until needed
Large bowl to hold peanuts and salt them.
Pastry brush or bar-b-que brush (I use the latter)

INSTRUCTIONS

Put water, cream of tartar, sugar and maple syrup in the pot. Place the candy thermometer in the pot. Put heat on medium-low. Stir gently. When mixture starts to boil, wet the pastry brush with water and brush off any crystals on the side of the pot. Stop stirring, and raise heat to medium. During this time, put the peanuts in a bowl and add salt. The peanuts should have a very mild salty taste.

When the thermometer hits 310 degrees, start watching carefully. When it hits 320, stare. If you like lighter brittle, remove from heat immediately. If you like a darker smokier brittle, wait till it gets to 325 degrees. In either case, immediately add peanuts and butter to the pot and stir with the greased wooden spoon. When mixed, carefully pour onto the greased cookie sheet. If the sheet is to large, you can use the spoon to minimize the surface area of the brittle. It should be about 1/4 " thick. Let cool and you have brittle. Remove from cookie sheet with a spatula and smash into brittle sized pieces with a meat tenderizer. Makes a lot.

Tuesday, October 17, 2006

Coffee is still good


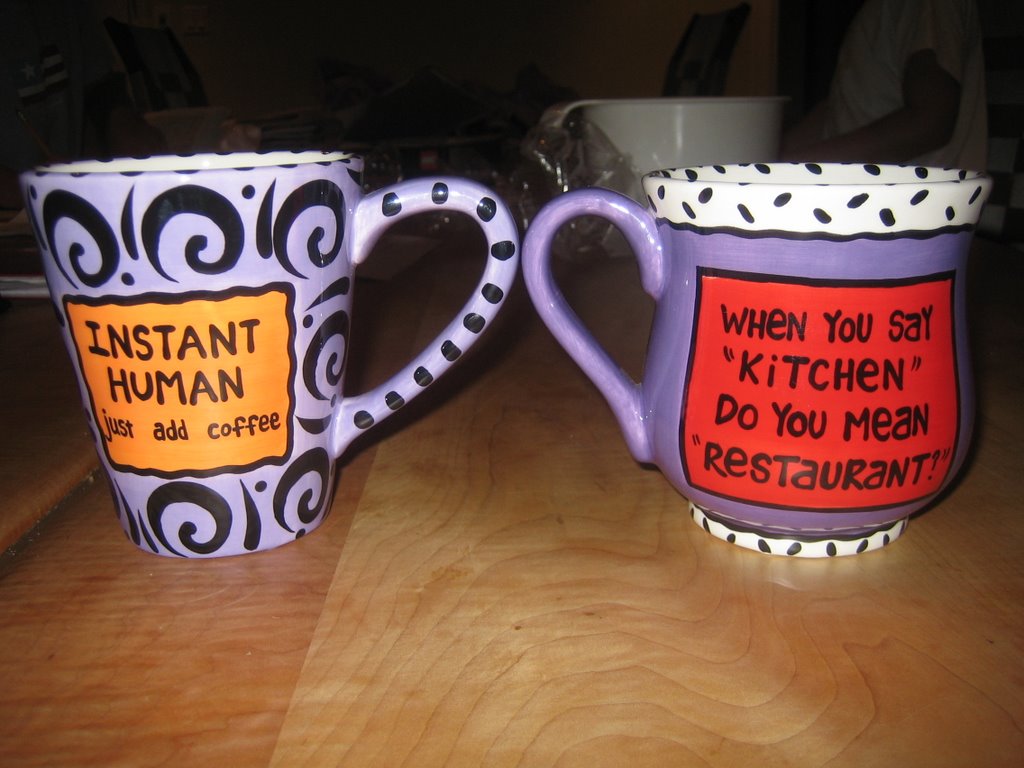
And now... Coffee cups. Yesterday was our anniversary (12 years!) and my mother in law got us great cups from Our Name is Mud. You can see the photos, and I while I won't say which cup went to which of us, you can guess. At their website, they offer a wide variety of cups, which seem to be the Hallmark cards of our generation. I have linked to a few a find really funny, but there are a lot of cups there.

Mr. Right and Mrs. Always Right

Talking Cereal Bowl
If it Ain't Coffee it Ain' Breakfast
Go Ask Your Mother

Sunday, October 15, 2006

Two Good Gadgets From Oxo

I recently bought two new implements from Zabar's. The first is the OXO "Good Grips" Y peeler, which I think is easier on the hand than a traditional side holding peeler. Although you can sharpen peeler blades, it is much easier to "end than mend" and I like the fact that you can replace the blade easily. It was $9.49 at the store.

I also bought a second OXO SteeL Meat Tenderizer for $13.98 from Zabar's. I already have one in the country, and like its heft and its two sided hammer head. I feel like a get less hand shock when I use this hammer with a rubberized grip. Great for leg of lamb!

Tuesday, October 10, 2006

Knives, a begining


I like knives. I have found, that, even as an amatuer, a good, sharp knife makes cooking much easier. Using an 8" knife, I can do almost anything I need to in the kitchen. Although I started off using Wustoff knives, I have now switched entirely to Global Knives. I use two reguarly, the G2 Chef's knife and its "Japanese" counterpart, the G7. I bought both at Zabar's (www.zabars.com) which is near my house (although they ship) and have an excellent selection. The knives are very similar, although I have a slight preference for the G7. All global knives are "asymetric" and require special equipment to sharpen them. This is available anywhere you get the knives. I personally like when my friend Eli comes by with his Japanese whetstone and sharpens them for me, but this only happens on special occasions.